Viewing your Trades
Different ways to view and edit existing Trades

Viewing your Trades
This is a brief article about the different ways you can view and edit an existing Trade. If you want to build your first Trade, see here. If you want to control who can see and edit certain features in Trades, see here.
Different ways to view your Trades
A detailed view
To see a list of your Trades, navigate to the “Trades” tab. If you have more than five Trades built, you can select the “View All” button to see a complete list of the Trades; by default, the Trades tab shows only your five most recently added Trades.
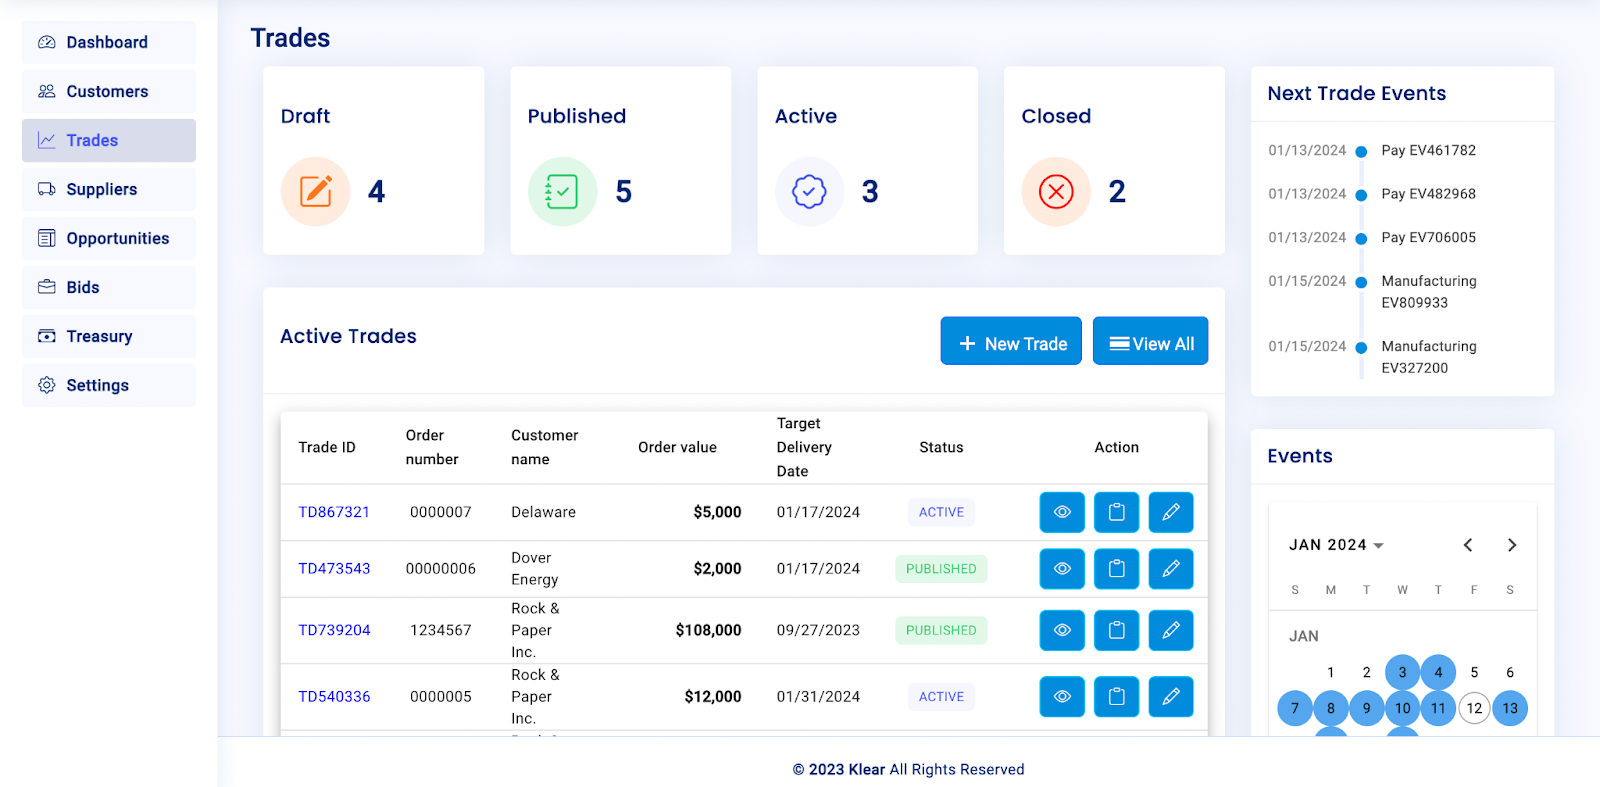
(To edit a Trade from this list view, you can click on the blue pencil icon next to the desired Trade.)
To see the full details of a single Trade, click on the Trade ID (in blue text) that you see in the list of Trades. This will give you a full view of all the details of that Trade. The “Activity” tab will show you a timeline of milestones associated with that Trade. The “Files” tab will show you any purchase orders or other files you’ve uploaded. The “Cost” tab will show you a Klear-generated breakdown of your costs and margins associated with this Trade. Finally, the “Invoices” tab will show you any invoices which you’ve generated and sent using Klear.
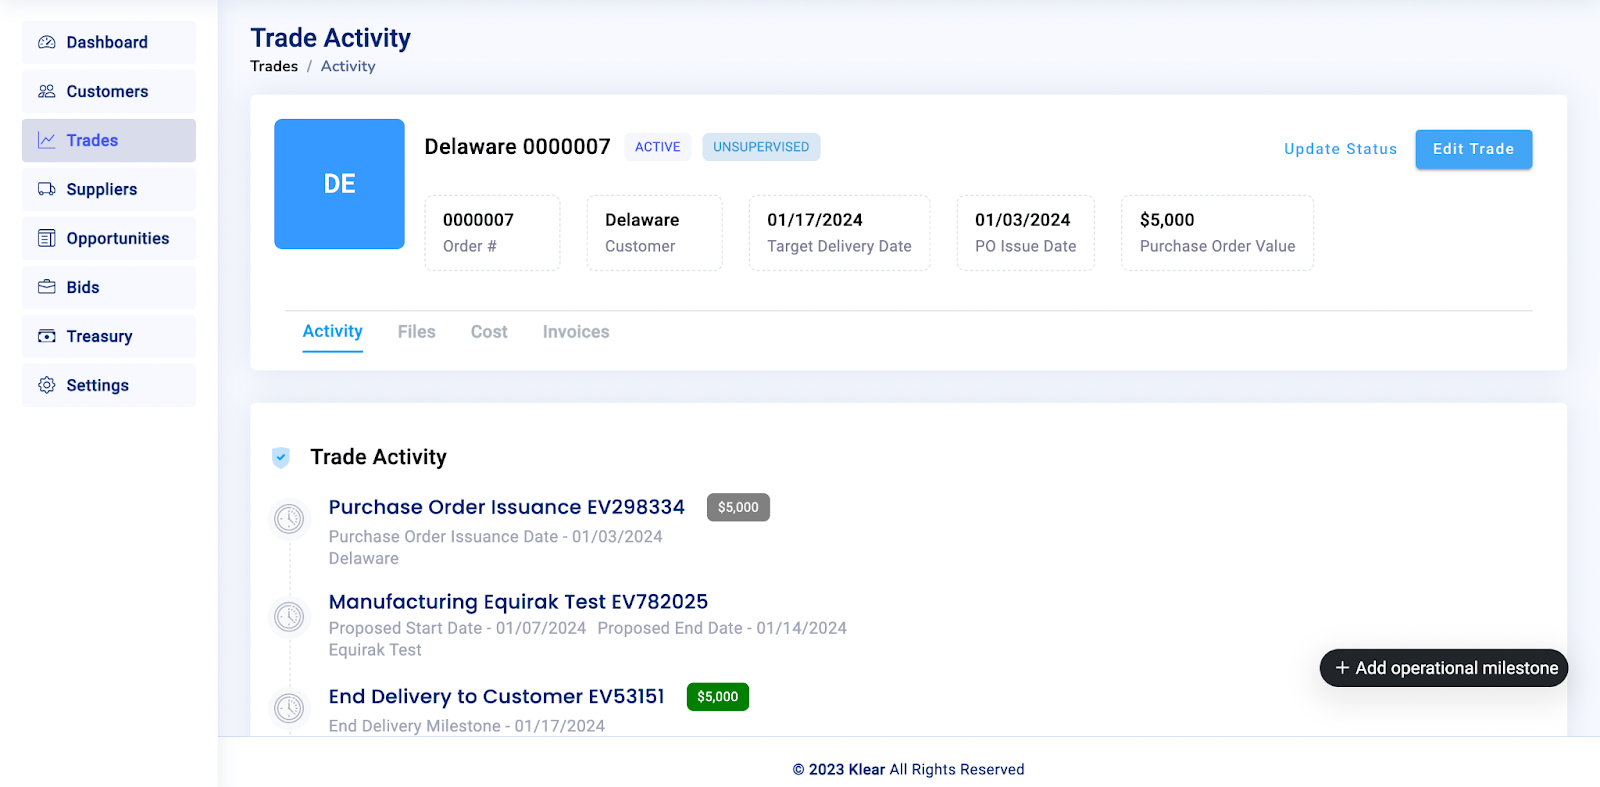
To edit a Trade in this view, you can click the “Edit Trade” button.
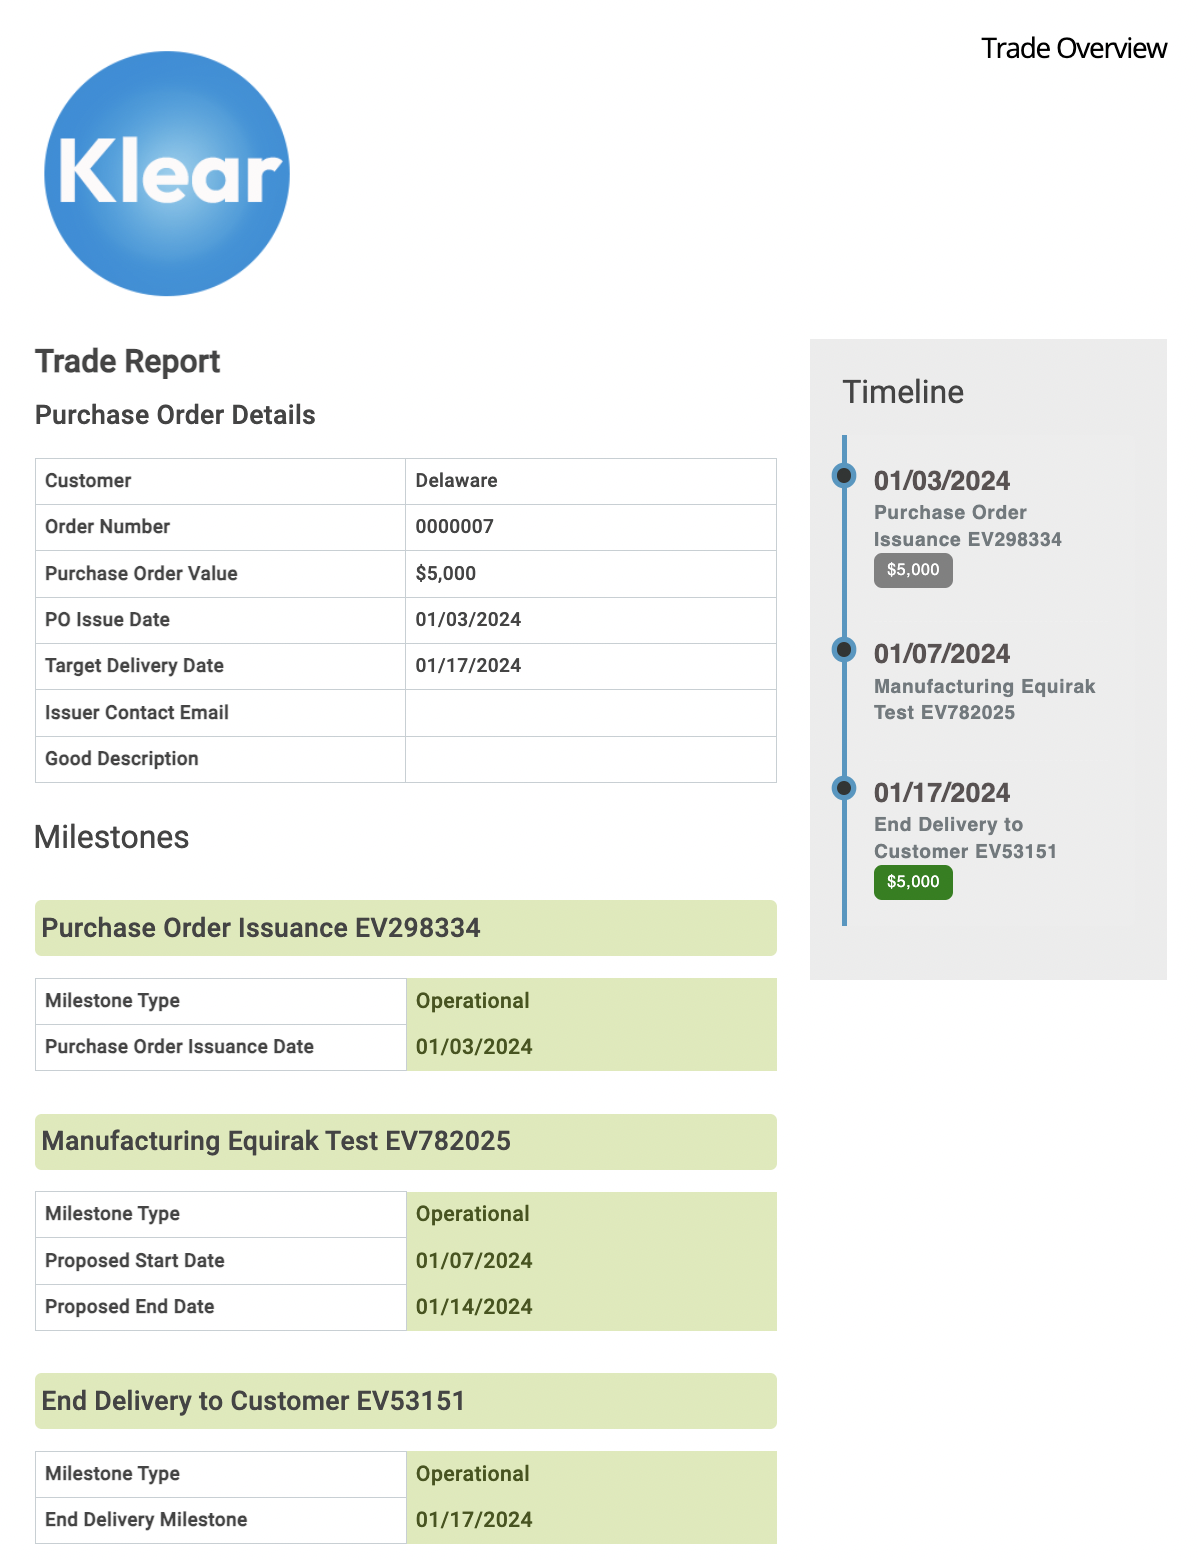
A simple view
To see a simpler view of a Trade, start in the “Trades” tab in Klear, then click on the blue eye icon next to the desired Trade. This will generate a single, simple document showing a timeline of the financial and operational milestones associated with the Trade, as well as the basic data you’ve entered for the Trade. This is useful for a quick understanding of a single Trade, or if you want to print out Trade details or save them to a PDF.